本文最后更新于:2 个月前
前言
新手学习一门编程语言总是很迷茫的,除了枯燥的语法,还要学习其庞大的生态,如果你不了解生态,那么掌握语法也是空。在Rust中,也有着跟其他语言一样的Web开发生态,但是基本上都是一言难尽。如果你对rust比较关注,那么你至少应该了解过Axum,Rocket,Actix-web三座大山,但是rust学习曲线陡峭,我认为新手尤其是国内开发者并不适合使用这些,本来语法就难,还要被各种概念卷的晕头转向,我更推荐Salvo(赛风),功能全,文档也丰富,更加适合中国开发者。本文介绍的是一个设计理念跟Django差不多的轻量化Web开发框架,虽然小众,但是五脏俱全,可快速开发出简单的web应用。
Anansi是一个使用Rust写的简单MVC的web框架,在我的使用体验中,我更加觉得这个框架就是Rust版的Django,如果你有Django开发经验,那么将会非常轻而易举的上手开发安全又高性能的web应用,如果你没有Django开发经验,那么也不要慌,跟着本文做完这个小demo,基本上可以用rust做出你想象中的那个应用。
让我们现在就开始入门学习他吧。
一、安装
首先执行以下命令安装Anansi
执行以后会自动将依赖等都安装好,就是下图的样子。
 查看Anansi的版本,如果返回版本号,说明你已经安装成功,运行正确的结果如下图所示

二、入门案例
注意:本段内容为官网原文翻译
1.创建一个基础的网站
确保你的版本与我一致,然后创建一个项目
这个代码将会创建一个名字为mini-forum的项目,其中包含以下必要文件
http_errors/ - http错误处理页面main.rs - 应用和集合project.rs - 项目设置urls.rs - 管理路由
从以上文件可以看出这个web框架其实就是mvc的老三样。
注意:Anansi默认自带一个Sqlite数据库,如果你想要使用PostgreSQL,那么需要完成以下三步
- 在
Cargo.toml中将sqlite改成postgres
- 在
src/project.rs中修改database!(sqlite)为database!(postgres)
- 在
settings.toml将[databases.default]部分修改成以下代码
1
2
3
4
| name = "mydatabase"
user = "myuser"
password = "mypassword"
address = "127.0.0.1:5432"
|
2.启动web服务器
启动web服务器非常简单,只需要cmd切换到mini-forum/ 目录,然后运行以下命令即可
如果运行没有任何错误,直接访问http://127.0.0.1:9090/即可看到创建的网站了。
官方项目git: https://github.com/saru-tora/mini-forum
3.创建一个应用
这块内容用过Django的都熟悉,应该能轻松理解,你只需要知道一个web由多个应用组成就行了。
运行以下命令来创建一个应用,以名字forum为例
然后你就会看到创建了一个forum目录,其中有以下文件
1
2
3
4
5
| .
├── migrations
├── mod.rs
├── records.rs
└── urls.rs
|
这些文件的功能你跟着教程走下去就知道是做什么的了。
接下来在main.rs中包含启用这个应用
1
2
3
4
5
6
7
| mod forum;
apps! {
auth,
sessions,
forum,
}
|
4.定义记录结构
在forum目录应该能看到文件records.rs,这个就是记录,也就是数据库中的记录,首先定义记录结构,
等同于Entity
1
2
3
4
5
6
7
8
9
10
11
12
13
14
15
16
17
18
19
20
| use anansi::records::{VarChar, DateTime, ForeignKey};
use anansi::util::auth::records::User;
#[record]
#[derive(Relate, FromParams)]
pub struct Topic {
pub title: VarChar<200>,
pub user: ForeignKey<User>,
pub content: VarChar<40000>,
pub date: DateTime,
}
#[record]
#[derive(Relate, FromParams)]
pub struct Comment {
pub topic: ForeignKey<Topic>,
pub user: ForeignKey<User>,
pub content: VarChar<40000>,
pub date: DateTime,
}
|
#[record]会默认添加一个id字段,并且像topic::date这种字段就可以使用order_by来查询数据库。Relate表现的是实体之间的关系FromParams 将允许你从请求的参数中获取记录,也就是反序列化ForeignKey 用来表示外键约束,表示Topic和User有多对一的关系
5.迁移数据库
在定义好记录结构后,即可生成迁移文件,同步到数据库,首先是第一步生成迁移文件
1
| ananc make-migrations forum/
|
如果你想要查看本次迁移的SQL,那么就执行以下命令
1
| ananc sql-migrate forum 0001
|
输出将会根据你所选的数据库所生成SQL,如果你使用的是postgresql,那么就会看到以下代码
1
2
3
4
5
6
7
8
9
10
11
12
13
14
15
16
17
18
19
20
21
22
23
24
25
26
27
28
29
30
31
| CREATE TABLE "forum_topic" (
"id" bigint NOT NULL PRIMARY KEY,
"title" varchar(200) NOT NULL,
"user" bigint NOT NULL
REFERENCES "auth_user" ("id")
ON DELETE CASCADE
DEFERRABLE INITIALLY DEFERRED,
"content" varchar(40000) NOT NULL,
"date" timestamp NOT NULL
);
CREATE INDEX "forum_topic_user_index" ON "forum_topic" ("user");
CREATE TABLE "forum_comment" (
"id" bigint NOT NULL PRIMARY KEY,
"topic" bigint NOT NULL
REFERENCES "forum_topic" ("id")
ON DELETE CASCADE
DEFERRABLE INITIALLY DEFERRED,
"user" bigint NOT NULL
REFERENCES "auth_user" ("id")
ON DELETE CASCADE
DEFERRABLE INITIALLY DEFERRED,
"content" varchar(40000) NOT NULL,
"date" timestamp NOT NULL
);
CREATE INDEX "forum_comment_topic_index" ON "forum_comment" ("topic");
CREATE INDEX "forum_comment_user_index" ON "forum_comment" ("user");
|
接下来应用迁移,执行
6.前端渲染记录
首先可以先生成前端文件,切到forum目录,然后运行
就会生成forum/topic/views.rs文件,进行编辑
1
2
3
4
5
6
7
8
9
10
11
| use super::super::records::{Topic, topic::date};
#[viewer]
impl<R: Request> TopicView<R> {
#[view(Site::is_visitor)]
pub async fn index(req: &mut R) -> Result<Response> {
let title = "Latest Topics";
let topics = Topic::order_by(date().desc())
.limit(25).query(req).await?;
}
}
|
Site::is_visitor将会校验是否是游客,如果是游客,也就是访问时,那么就会将”Latest Topics”赋值给变量title,然后再将最新的25个topic赋值给变量topics
接下来渲染这些变量到前端,打开forum/topic/templates/index.rs.html,进行如下改动
1
2
3
4
5
6
7
8
9
10
| @block title {@title}
@block content {
<h1>@title</h1>
<ul>
@for topic in topics {
<li>@topic.title</li>
}
</ul>
}
|
可以看到这种一种简单的模板语法,使用@来格式化变量成字符串,读者可以自行体会。
然后添加路由,打开urls.rs文件添加以下内容
1
2
3
4
5
6
7
| use crate::forum::{self, topic::views::TopicView};
pub fn routes<R: Request>() -> Router<R> {
Router::new()
.route("", TopicView::index)
.nest("/topic", forum::urls::routes())
}
|
此时你可以打开http://127.0.0.1:9090/,然而并不会看到任何topic,一个因为数据库本来就没有数据,一个是因为你需要加访问的路径,例如http://127.0.0.1:9090/topic
7. 使用组件
组件是用来做网页的交互的,其中真义只有跟着做下去才知道。
首先还是安装环境,进入项目根目录,也就是mini-forum/下,运行命令
This will create the mini-forum-comps and mini-forum-wasm crates. In mini-forum-comps/Cargo.toml, add the following dependency:
这个操作将会创建mini-forum-comps和mini-forum-wasm包,在mini-forum-comps/Cargo.toml中添加以下依赖
1
| gloo-net = { version = "0.2", features = ["http", "json"] }
|
不建议随便更新版本,因为会出现无法预料的问题,rust就是这样的。
然后创建mini-forum-comps/src/loader.rs,并写入以下内容
1
2
3
4
5
6
7
8
9
10
11
12
13
14
15
16
17
18
19
20
21
22
23
24
25
26
27
28
29
30
31
32
33
34
35
36
37
38
39
40
41
42
43
44
45
46
47
48
49
50
51
52
53
54
55
56
57
58
| use anansi_aux::prelude::*;
use gloo_net::http::Request;
#[derive(Properties, Serialize, Deserialize)]
pub struct LoaderProps {
pub load_url: String,
pub show_url: String,
}
#[derive(Serialize, Deserialize)]
pub struct Data {
pub id: String,
pub title: String,
}
#[store]
#[derive(Serialize, Deserialize)]
pub struct Loader {
visible: bool,
page: u32,
fetched: Vec<Data>,
}
#[component(Loader)]
fn init(props: LoaderProps) -> Rsx {
let mut state = Self::store(true, 1, vec![]);
let (data_resource, handle_click) = resource!(Vec<Data>, state, props, {
*state.visible_mut() = false;
let request = Request::get(&props.load_url)
.query([("page", state.page().to_string())]);
});
rsx!(state, props, data_resource, {
@for data in state.fetched() {
<li>@href props.show_url, data.id {@data.title}</li>
}
@resource data_resource, state {
Resource::Pending => {
<div>Loading...</div>
}
Resource::Rejected(_) => {
*state.visible_mut() = true;
<div>Problem loading topics</div>
}
Resource::Resolved(mut f) => {
if f.len() == 25 && *state.page() < 3 {
*state.page_mut() += 1;
*state.visible_mut() = true;
}
state.fetched_mut().append(&mut f);
}
}
@if *state.visible() {
<button @onclick(handle_click)>Load more</button>
}
}
}
|
这段代码创建了一个按钮,点击后将请求到topics.
现在修改mini-forum-comps/src/lib.rs,
1
2
3
4
5
| pub mod loader;
anansi_aux::app_components! {
loader::Loader,
}
|
然后在src/main.rs中就可以使用这个包了
1
2
3
4
| app_statics! {
admin,
wasm_statics!("mini-forum-wasm"),
}
|
然后你就可以在forum/topic/views.rs中添加一个load方法
1
2
3
4
5
6
7
8
9
10
11
12
13
14
15
16
17
18
19
20
21
22
23
24
25
26
27
28
| use anansi::{url, check, http_404};
use mini_forum_comps::loader::{Loader, Data};
#[viewer]
impl<R: Request> TopicView<R> {
#[view(Site::is_visitor)]
pub async fn index(req: &mut R) -> Result<Response> {
let title = "Latest Topics";
let topics = Topic::order_by(date().desc())
.limit(25).query(req).await?;
let show_url = "/topic";
let load_url = url!(req, Self::load);
}
#[check(Site::is_visitor)]
pub async fn load(req: &mut R) -> Result<Response> {
let page: u32 = req.params().get("page")?.parse()?;
if page > 3 {
http_404!();
}
let topics = Topic::order_by(date().desc())
.limit(25).offset(25 * page).query(req).await?;
let data: Vec<Data> = topics.iter().map(|t| {
Data {id: t.pk().to_string(), title: t.title.to_string()}
}).collect();
Ok(Response::from_json(serde_json::to_string(&data)?))
}
}
|
然后添加load的路由,文件位置forum/urls.rs
1
2
3
4
5
6
| use super::topic::views::TopicView;
pub fn routes<R: Request>() -> Router<R> {
Router::new()
.route("load", TopicView::load)
}
|
接下来就可以在前端进行调用了,文件位置forum/topic/templates/index.rs.html
1
2
3
4
5
6
7
8
9
10
11
12
13
| @block content {
@load components {
<h1>@title</h1>
<ul>
@for topic in &topics {
<li>@topic.title</li>
}
@if topics.len() == 25 {
<Loader @show_url @load_url />
}
</ul>
}
}
|
此时你再次运行web服务器
当然,你也并不会看到什么东西,你进数据库添加几条内容就可以看到预期效果了
8. 组件级css
这部分内容搞前端的同学应该相当熟悉了,要实现的功能就是css只应用于当前的组件。
例如,创建一个spinner组件,文件mini-forum-comps/src/spinner.rs
1
2
3
4
5
6
7
8
9
10
11
12
13
14
15
16
17
18
19
20
21
22
23
24
25
26
27
28
29
30
31
| use anansi_aux::prelude::*;
#[function_component(Spinner)]
fn init() -> Rsx {
style! {
div {
display: inline-block;
width: 25px;
height: 25px;
border: 3px solid #cfd0d1;
border-radius: 50%;
border-top-color: #1c87c9;
animation: spin 1s ease-in-out infinite;
-webkit-animation: spin 1s ease-in-out infinite;
}
@keyframes spin {
to {
-webkit-transform: rotate(360deg);
}
}
@-webkit-keyframes spin {
to {
-webkit-transform: rotate(360deg);
}
}
}
rsx! {
<div></div>
}
}
|
这段代码通过function_component创建了一个组件,因为他不需要状态管理,然后css写在了style宏内,现在将这些东西添加到mini-forum-comps/src/lib.rs
1
2
3
4
5
6
7
8
9
10
| pub mod spinner;
anansi_aux::comp_statics! {
"spinner",
}
anansi_aux::app_components! {
loader::Loader,
spinner::Spinner,
}
|
注册这个组件,文件位置src/main.rs
1
2
3
4
5
| app_statics! {
admin,
wasm_statics!("mini-forum-wasm"),
eddit_comps,
}
|
这样你就可以在loader中使用了,文件位置mini-forum-comps/src/loader.rs
1
2
3
4
5
6
7
8
9
10
11
12
13
14
15
16
17
18
19
20
21
22
23
| use crate::spinner::Spinner;
#[component(Loader)]
fn init(props: LoaderProps) -> Rsx {
rsx! {
@for data in &state.fetched {
<li>@href props.show_url, data.id {@data.title}</li>
}
@resource data_resource {
Resource::Pending => {
<Spinner />
}
}
@if state.visible {
<button @onclick(handle_click)>Load more</button>
}
}
}
|
9. 集成 Tailwind
首先安装Tailwind
然后在forum/topic/templates/base.rs.html中编辑
1
2
3
4
5
6
7
8
9
10
11
| <!DOCTYPE html>
<html lang="en">
<head>
<meta charset="utf-8">
<title>@block title</title>
<link href="/static/styles/global.css" rel="stylesheet">
</head>
<body>
@block content
</body>
</html>
|
这样你就可以在项目中使用Tailwind类了。
10. 添加缓存
首先添加序列化的依赖,文件位置Cargo.toml
1
2
| serde = { version = "1.0", features = ["derive"] }
serde_json = "1.0"
|
对于小型网站,默认使用Moka就可以了,如果是大型网站,那么建议你使用redis,按照以下步骤
- 需要在
Cargo.toml中添加redis特性,
- 在
src/project.rs中将app_cache!(local) 换成 app_cache!(redis)
- 在
settings.toml中的[caches.default]字段添加location = "redis://127.0.0.1/"
然后记录添加序列化相关特性,文件位置forum/records.rs
1
2
3
4
5
6
7
8
9
10
| use serde::{Serialize, Deserialize};
#[record]
#[derive(Relate, FromParams, Serialize, Deserialize)]
pub struct Topic {
pub title: VarChar<200>,
pub user: ForeignKey<User>,
pub content: VarChar<40000>,
pub date: DateTime,
}
|
然后你就可以在视图层使用你的缓存了,文件位置forum/topic/views.rs
1
2
3
4
5
6
7
8
9
10
11
12
13
| use anansi::cache::prelude::*;
#[viewer]
impl<R: Request> TopicView<R> {
#[view(Site::is_visitor)]
pub async fn index(req: &mut R) -> Result<Response> {
let title = "Latest Topics";
let topics = cache!(req, Some(30), "topic_index", {
Topic::order_by(date().desc())
.limit(25).query(req).await?
});
}
}
|
缓存会每30s请求一次数据库到topic_index
11. 创建一个超级管理员
看到这里的伙伴应该一下就能想到django吧,这块简直就是rust版的django,你只需运行下面命令输入账号密码即可
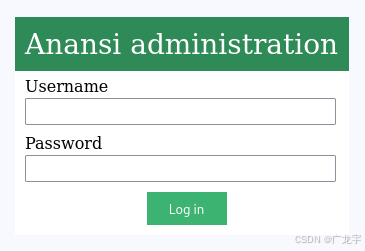
创建好超级管理员账户以后, 运行web服务器,然后打开http://127.0.0.1:9090/admin/login就可以登陆了,自带了一个超级管理员后台
管理后台主页
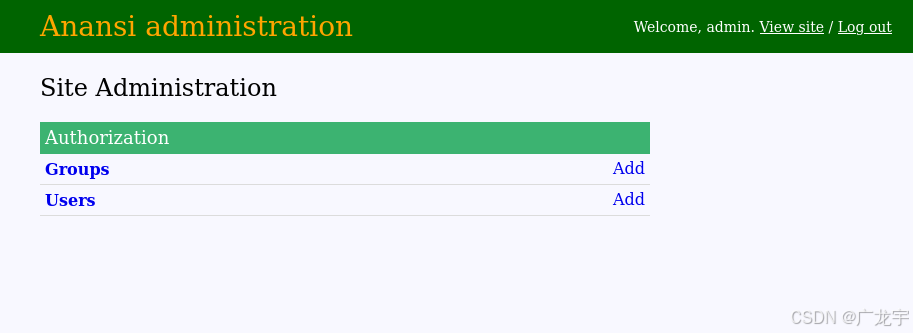
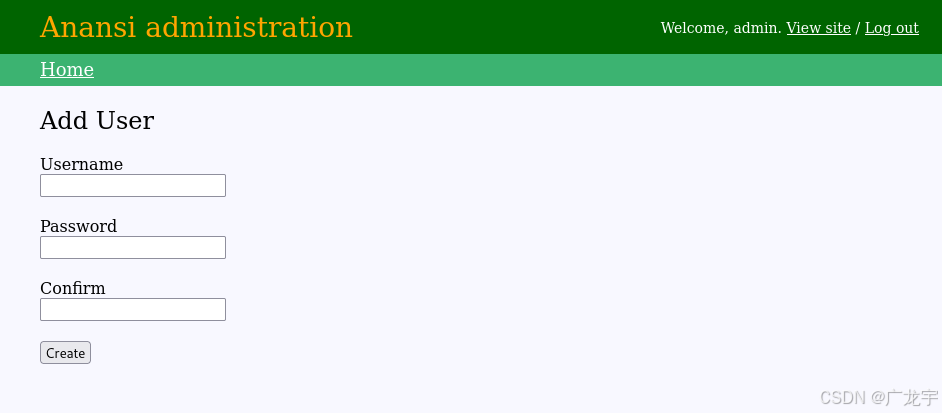
然后你就可以添加用户了,点击User 右边的Add
12. 添加剩余视图
在 forum/records.rs中添加
1
2
3
4
5
6
7
8
9
10
11
12
13
14
15
16
17
| use anansi::db::OrderBy;
use anansi::ToUrl;
#[record]
#[derive(Relate, FromParams, Serialize, Deserialize, ToUrl)]
pub struct Topic {
pub title: VarChar<200>,
pub user: ForeignKey<User>,
pub content: VarChar<40000>,
pub date: DateTime,
}
impl Topic {
pub fn recent_comments(&self) -> OrderBy<Comment> {
Comment::by_topic(self).order_by(comment::date().desc())
}
}
|
ToUrl将会返回一个简写的id,例如ixNr1-tGUe9,by_topic是通过添加外键约束生成的,用来筛选结果。
然后添加路由,文件位置forum/urls.rs
1
2
3
4
5
6
7
| use super::topic::views::TopicView;
pub fn routes<R: Request>() -> Router<R> {
Router::new()
.route("{topic_id}", TopicView::show)
}
|
{topic_id}将会匹配到请求url中的参数。
然后更新forum/topic/views.rs
1
2
3
4
5
6
7
8
9
10
11
12
13
14
15
| use anansi::get_or_404;
use anansi::humanize::ago;
#[viewer]
impl<R: Request> TopicView<R> {
#[view(Site::is_visitor)]
pub async fn show(req: &mut R) -> Result<Response> {
let topic = get_or_404!(Topic, req);
let title = &topic.title;
let poster = topic.user.get(req).await?.username;
let comments = topic.recent_comments().limit(25).query(req).await?;
let users = comments.parents(req, |c| &c.user).await?;
}
}
|
在show中,get_or_404! 宏将会通过topic_id来筛选指定的topic否则返回404错误,用户用comments来检索parents。
现在添加前端的模板forum/topic/templates/show.rs.html
1
2
3
4
5
6
7
8
9
10
11
| @block title {@title}
@block content {
<h1>@title</h1>
<p><small>Posted by @poster @ago(topic.date)</small></p>
<p>@topic.content</p>
@for (comment, user) in comments.iter().zip(users.iter()) {
<p><small>Posted by @user.username @ago(comment.date)</small></p>
<p>@comment.content</p>
}
}
|
然后在Index中添加指向show的连接,文件位置forum/topic/templates/index.rs
1
2
3
4
5
6
7
8
| @block content {
<h1>@title</h1>
<ul>
@for topic in topics {
<li>@link req, Self::show, topic {@topic.title}</li>
}
</ul>
}
|
link等同于
1
| <a href="topic/@topic.to_url()">@topic.title</a>
|
13. 实现用户登陆
本例子直接复用了管理员登陆的页面,当然,你也可以自己写一个页面,文件位置forum/topic/views.rs
1
2
3
4
5
6
7
8
9
10
11
12
13
14
15
16
17
| use anansi::handle;
use anansi::forms::ToRecord;
use anansi::util::auth::forms::UserLogin;
#[viewer]
impl<R: Request> TopicView<R> {
#[view(Site::is_visitor)]
pub async fn login(req: &mut R) -> Result<Response> {
let title = "Log in";
let button = "Log in";
let form = handle!(UserLogin, ToRecord<R>, req, user, {
req.auth(&user).await?;
req.session().set_and_redirect(req, Self::index)
})?;
}
}
|
handle!宏会创建一个新的form,如果请求是GET的话。否则将提交表单登陆,如果失败则返回结果,你可以在forum/topic/templates/login.rs.html中找到他
1
2
3
4
5
6
7
8
9
10
11
12
13
14
15
16
17
18
| @block title {@title}
@block content {
<h1>@title</h1>
<div>
@build form {
@unescape form.errors()
@for field in form.fields() {
@unescape field.label_tag()
<div>
@unescape field
@unescape field.errors()
</div>
}
@unescape form.submit(button)
}
</div>
}
|
使用模板来构建表单要比纯html实现安全的多。错误就使用无序列表显示了
1
2
3
| <ul class="form-errors">
<li>Problem with username or password.</li>
</ul>
|
字段中的错误将会被field-errors所代替
然后添加路由,文件位置urls.rs
1
2
3
4
5
6
| pub fn routes<R: Request>() -> Router<R> {
Router::new()
.route("/", TopicView::index)
.nest("/topic", forum::urls::routes())
.route("/login", TopicView::login)
}
|
现在就可以用超管页面登陆用户账号了。
14. 实现创建帖子
在forum/forms.rs中添加一个表单
1
2
3
4
5
6
7
8
9
10
11
12
13
14
15
16
17
18
19
20
21
22
23
24
| use crate::prelude::*;
use anansi::records::{DateTime, ForeignKey};
use anansi::forms::{VarChar, ToRecord};
use super::records::Topic;
#[form(Topic)]
pub struct TopicForm {
pub title: VarChar<200>,
pub content: VarChar<40000>,
}
#[async_trait]
impl<R: Request> ToRecord<R> for TopicForm {
async fn on_post(&mut self, data: TopicFormData, req: &R) -> Result<Topic> {
Topic::new()
.title(data.title)
.user(ForeignKey::from_data(req.user().pk())?)
.content(data.content)
.date(DateTime::now())
.saved(req)
.await
.or(form_error!("Problem adding topic"))
}
}
|
#[form(Topic)]生成了一个TopicFormData结构,将会保持表单中的数据,并且与Topic关联. on_post将会尝试将表单数据转化成一个记录。form_error将会简单的创建一个FormError,它将会与表单的errors关联。
然后在forum/mod.rs添加
然后在forum/topic/views.rs中使用他
1
2
3
4
5
6
7
8
9
10
11
12
13
14
15
16
| use anansi::{check, extend};
use crate::forum::forms::TopicForm;
#[viewer]
impl<R: Request> TopicView<R> {
#[check(Site::is_auth)]
pub async fn new(req: &mut R) -> Result<Response> {
let title = "New Topic";
let button = "Create";
let form = handle!(TopicForm, ToRecord<R>, req, |topic| {
Ok(redirect!(req, Self::show, topic))
})?;
extend!(req, base, "login")
}
}
|
Site::is_auth实现了如果用户未登陆则重定向到访客页面。由于重定向不是异步的,所以给handle!宏传递一个闭包。至于模板,你可以简单的复用login.rs.html通过使用check和extend宏,如果是实际要用的网站,你就需要自定义了。如果用户已经登陆了,也可以添加一个连接到index.rs.html的链接。
1
2
3
4
5
6
7
8
9
10
11
| @block content {
<h1>@title</h1>
@if req.user().is_auth() {
@link req, Self::new {New Topic}
}
<ul>
@for topic in topics {
<li>@link req, Self::show, topic {@topic.title}</li>
}
</ul>
}
|
然后添加路由, 文件位置urls.rs
1
2
3
4
5
| pub fn routes<R: Request>() -> Router<R> {
Router::new()
.route("new", TopicView::new)
.route("{topic_id}", TopicView::show)
}
|
15. 实现更新帖子功能
首先需要给记录添加特性,文件位置forum/forms.rs
1
2
3
4
5
6
7
8
| use anansi::{GetData, ToEdit};
#[form(Topic)]
#[derive(GetData, ToEdit)]
pub struct TopicForm {
pub title: VarChar<200>,
pub content: VarChar<40000>,
}
|
然后添加一个视图
1
2
3
4
5
6
7
8
9
10
11
12
13
14
15
16
| use anansi::handle_or_404;
use anansi::forms::ToEdit;
#[viewer]
impl<R: Request> TopicView<R> {
#[check(Topic::owner)]
pub async fn edit(req: &mut R) -> Result<Response> {
let title = "Update Topic";
let button = "Update";
let form = handle_or_404!(TopicForm, ToEdit<R>, req, |topic| {
Ok(redirect!(req, Self::show, topic))
})?;
extend!(req, base, "login")
}
}
|
Topic::owner将会检查文章是否是自己的。handle_or_404!宏与handle!类似,但是如果记录找不到则返回404.其余的跟之前一样,继续复用login.rs.html,如果文章是自己的,那么你也可以在show.rs.html添加一个链接,如果这篇文章的作者就是当前用户。
1
2
3
4
5
6
7
8
9
10
11
12
| @block content {
<h1>@title</h1>
<p><small>Posted by @poster @ago(topic.date)</small></p>
<p>@topic.content</p>
@if topic.user.pk() == req.user().pk() {
@link req, Self::edit, topic {Edit}
}
@for (comment, user) in comments.iter().zip(users.iter()) {
<p><small>Posted by @user.username @ago(comment.created)</small></p>
<p>@comment.content</p>
}
}
|
接着更新路由
1
2
3
4
5
6
7
| pub fn routes<R: Request>() -> Router<R> {
Router::new()
.route("new", TopicView::new)
.route("{topic_id}", TopicView::show)
.route("{topic_id}/edit", TopicView::edit)
}
|
16. 超级管理员的功能
将Topic添加到超管后台
1
2
3
4
5
6
7
8
9
10
11
| use anansi::{init_admin, register, record_admin};
use super::records::Topic;
init_admin! {
register!(Topic),
}
record_admin! {Topic,
search_fields: [title, content, date],
}
|
然后在forum/mod.rs中添加
然后在main.rs中添加
1
2
3
4
| app_admins! {
auth,
forum,
}
|
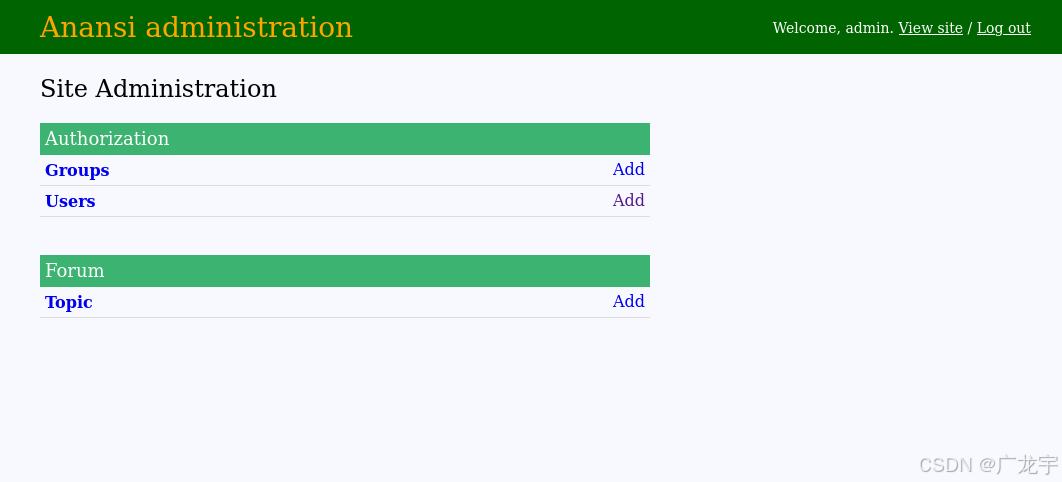
Topic将会在/admin/forum/topic中显示。
17. 实现删除帖子功能
首先视图添加一个方法,文件位置forum/topic/views.rs
1
2
3
4
5
6
7
8
9
10
11
12
13
| #[viewer]
impl<R: Request> TopicView<R> {
#[view(Topic::owner)]
pub async fn destroy(req: &mut R) -> Result<Response> {
let title = "Delete topic";
let topic = get_or_404!(Topic, req);
let form = handle!(req, R, {
topic.delete(req).await?;
Ok(redirect!(req, Self::index))
})?;
}
}
|
forum/topic/templates/destroy.rs.html中代码非常简单
1
2
3
4
5
6
7
8
9
| @block title {@title}
@block content {
<h1>@title</h1>
Are you sure you want to delete the topic "@topic.title"?
@build form {
@unescape form.submit("Confirm")
}
}
|
然后在forum/topic/templates/show.rs.html中添加一个链接
1
2
3
4
5
6
7
8
9
10
11
12
13
| @block content {
<h1>@title</h1>
<p><small>Posted by @poster @ago(topic.date)</small></p>
<p>@topic.content</p>
@if topic.user.pk() == req.user().pk() {
@link req, Self::edit, topic {Edit}
@link req, Self::destroy, topic {Delete}
}
@for (comment, user) in comments.iter().zip(users.iter()) {
<p><small>Posted by @user.username @ago(comment.created)</small></p>
<p>@comment.content</p>
}
}
|
最后再添加路由
1
2
3
4
5
6
7
| pub fn routes<R: Request>() -> Router<R> {
Router::new()
.route("new", TopicView::new)
.route("{topic_id}", TopicView::new)
.route("{topic_id}/edit", TopicView::edit)
.route("{topic_id}/destroy", TopicView::destroy)
}
|
到现在为止,本项目就算完成了,虽然功能不多,但耗时也挺久的,这些内容已经足够你开始做出自己的网站了,再深入的东西就没有,不然为什么叫轻量级web框架呢,后续的内容就需要自己探索了,但是光从这篇帖子就可以知道这个web框架做一些简单的应用还是很方便的,但是由于这个框架使用的是rust,学习难度高,但是框架不是很完善,所以性价比就比较差了,暂且可以当个玩具耍耍。